It is never too late to realise the better of the two services and when you do you don’t have to worry about your fully functioning website already setup using WordPress.com and is up and running perfectly. You can move your entire website from .com to .org with a handful of simple steps listed below and within a short span of time, your entire moving process will be finished in no time.
At first, you should be knowing all the features that WordPress.com offers to be aware of what to do and what is required for WordPress.org website.
Find a WordPress Host
When you ask a question about why I need web hosting, The answer is pretty clear that all of your files which you create for your WordPress website are going to be on a server, without it your site won’t be accessible to the world. You will be getting an error stating that this site can’t be reached.
With WordPress.com, you will be getting your hosting services directly by WordPress but with WordPress.com, you will have the freedom to choose the type of hosting service you’d want for your WordPress website.
Choosing a hosting service which offers you the type of services you are looking for is a tedious job considering the fact that it is important that the hosting service is cost effective as well as works perfectly.
Getting a Domain Name is The First Step
All you need is a domain name to get started and that’s how people find your website online. If you have a domain name already your ghost account should show the information regarding it but if you don’t have it, you should buy one instantly. This is the way
After that, you have to link your domain name to your hosting account and your web host will show you how to link your domain to your respective hosting account.
First Install Self-Hosted WordPress
If you own a web hosting account or just bought it for the first time, You should install WordPress. Majority of web hosting services offer one click installation of WordPress which means you will just have to install it according to their guides and it’s all set.
After that, pick up your domain name, fill in the required details and install it. Once you refresh your domain name, you will be able to see the default WordPress installations.
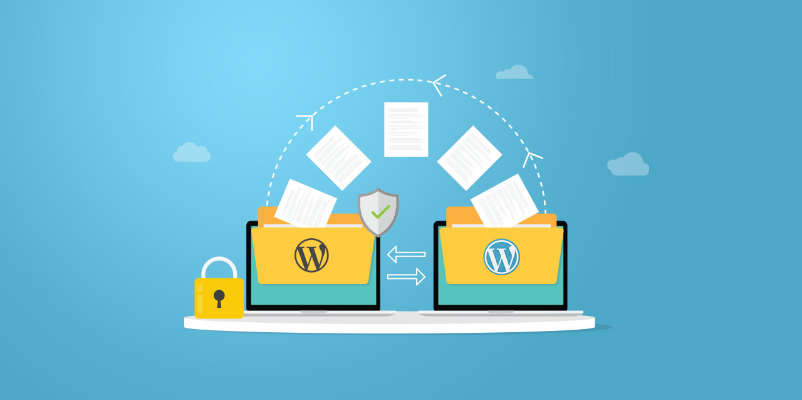
Move Your Content
Now that you’ve got your self hosted website ready, you can start the process of moving your content over from your WordPress.com site to your self-hosted website.
Step 1: Export your content From WordPress.com
You just have to export your content from wordpress.com blog to your self-hosted blog. For that. Login to your blog using wp-admin. That will take you to WordPress admin dashboard where you have to:
Navigate to Tools > Export (located towards the bottom of the menu) to access the export screen
There are two offered options free and paid, but you don’t have to pay unless you feel the need to, choose the free one then click the ‘Start Export’ option. You should choose the content you want to move. You can also choose “All Content’ to export everything then click the ‘Download Export’ file button and save the XML file on your computer.
Step 2: Import Your Content to Your New Blog
Install and activate a plugin which helps you import your data files. For now try the WordPress Importer plugin. Login to your self-hosted WordPress blog and navigate to Tools > Import:
Scroll to WordPress section
Click the Run Importer Link
Choose the XML file you got from your blog after that and upload the file and press Import. Assign imported content to an author already existing on your self-hosted blog. In addition to that, check the “Download and import file attachments” box to import your media then press the submit button.
It completely depends entirely on the size of your file and the time duration for it. The more the content, the longer will it take to upload them.
Customise your self-hosted Blog
Step #1 Choose a WordPress Theme
Install and activate your desired theme on your self-hosted blog. Just navigate to Appearance > Themes and click the Add New button at the top. Then search for your theme or upload your downloaded theme and install it. Follow the guides and install and activate your theme. But do consider using a WordPress child theme if you are planning on making significant changes to your theme.
With a little bit of changes and installing some suitable WordPress Plugins to boot, login back to the familiar admin dashboard and customise however you want.
Some Things to Consider
You’re almost there and successfully moved your website from WordPress.com to WordPress.org but that’s not the end of it all. You can now start considering to manage security, backups, spams, SEO and other services for your website. Keeping your hosting account and domain name paid to make sure that your blog is active and running all the time.
Check For Broken Links & Missing Images
After moving your entire website, you should ensure that all the images and links are properly working to avoid problems but some of them are missing or left behind, which is generally the case with heavy websites, consider using the plugins which serves the purpose of auto uploading images. Also check for any broken links and repair them all.
Final Thoughts
Transferring your blog from WordPress.com to WordPress.org is extremely easy if you follow these simple steps and you will be having your website in wordpress.org in no time and that too without any hassle. Summing it all up, you just have to download the XML file from your wordpress.com website, upload it to the self-hosted blog, make custom changes to its appearance and make required changes and you are ready to go.